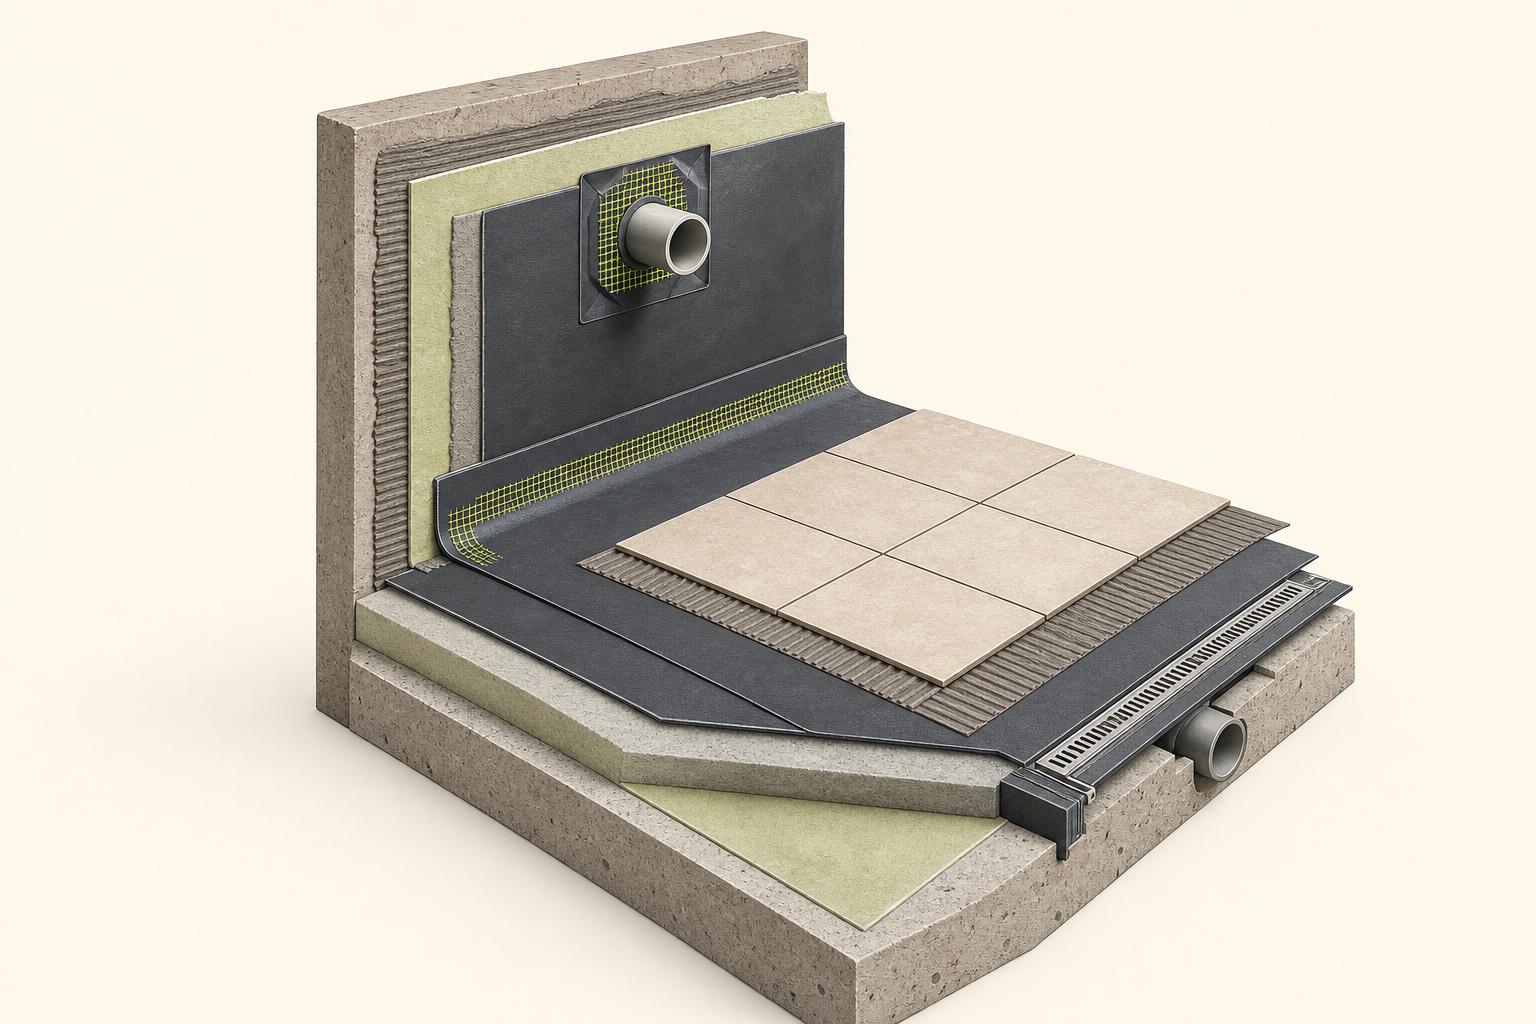
The hidden layer
What is wet-room waterproofing protecting?
The waterproofing protects the construction behind tiles and other finishes. Good grout and a well-fitted shower screen cannot replace a continuous waterproofing assembly.
Start by mapping where water can land, spread and remain. Floors, walls exposed to direct spray, floor-to-wall junctions, drains, corners and penetrations must be considered together rather than as isolated details.
The required solution depends on the expected intensity of use, substrate, structural movement, drainage and local rules. This guide explains transferable construction principles; it is not a literal translation of any Danish regulatory requirement.
Before work starts
Six checks before you begin
Water exposure
Map direct spray, frequent wetting and the paths water can take. Screens and room geometry influence exposure but do not remove the need to assess the floor.
Intensity of use
Consider frequency, duration and number of users. More demanding use calls for a more robust, documented system.
The substrate
It must be stable, even, sufficiently dry and free of dust, grease and loose material. Lightweight or moving constructions need a specific assessment.
Falls and drainage
The floor should move water to the drain without hollows or reverse falls. Drain type, position and connection must suit the construction.
Pipes and fittings
Penetrations must be fixed securely and detailed so that compatible collars can form a durable seal.
The complete system
Primer, tapes, collars, membrane, adhesive and grout must work as one documented assembly.
A robust sequence
From preparation to completed waterproofing
Plan the sequence so that completed waterproofing is exposed to as little foot traffic and damage as possible. The floor-to-wall junction must remain continuous throughout the chosen build-up.
01
Clean and prepare
Remove dust, grease and debris, including from the drain connection surface.
Inspection pointConfirm that the substrate is stable, even, sufficiently dry and suitable for the selected system.
02
Prime as specified
Use primer only where the system requires it and apply the documented quantity evenly.
Inspection pointContinue only after the primer has reached the condition stated in the installation instructions.
03
Seal corners and penetrations
Install tapes, reinforcement and collars without folds, open edges or incomplete contact.
Inspection pointCheck full contact around every detail and make sure pipes and fittings are securely fixed.
04
Connect to the floor drain
Follow the documented method for both the drain and the waterproofing system.
Inspection pointConfirm compatibility, height, restraint and a continuous watertight connection for the actual drain type.
05
Apply the waterproofing
Follow the specified tools, consumption, number of layers and drying times.
Inspection pointRecord material use and the completed build-up required by the selected system. The surface should be continuous and defect-free.
06
Protect and record
Plan access, protect the finished waterproofing and document details while they remain visible.
Inspection pointPhotograph drains, corners, joints and penetrations before tiles or other finishes conceal them.
Take extra care
Five critical details
Drain, waterproofing and connection method must form one documented watertight detail.
The junction must be sealed continuously with compatible reinforcement or tape.
The collar must suit both the pipe and the selected system, with full contact around the penetration.
Folds, stretched reinforcement and open edges can become weak points.
The waterproofing must end in a deliberate, continuous detail at the threshold and adjacent floor.
Before it is covered
Inspect and document the work
- Water exposure and expected intensity of use have been assessed
- Falls have been checked and there are no hollows or reverse falls
- The drain type, level and waterproofing connection suit the construction
- The required area is covered by one documented system
- There are no visible holes, cracks, folds or loose edges
- Corners, joints and penetrations use compatible system components
- Material consumption, cured build-up and drying times are recorded
- Critical details are photographed before they are covered
Keep product information, batch details, dates and photographs with the project quality records.
Frequently asked questions
What people ask
Are tiles and grout waterproof?
The visible finish is not the complete waterproofing system. Protection depends on the specified layers behind it and on sealed junctions, connections and penetrations.
Should the entire wet-room floor be waterproofed?
Where the room is intended to manage water, treat the floor as one continuous waterproofed assembly connected safely to the drainage system. Confirm the exact extent against the project specification and local requirements.
Can components from different systems be combined?
Only when the combination is documented as compatible. Otherwise, separate products may work individually without forming a reliable combined system.
How thick should the membrane be?
Follow the documented consumption, layer build-up and cured thickness for the selected system. The correct value depends on product, substrate, intended use and local requirements.
Which areas need the closest attention?
Areas exposed to direct spray or frequent wetting, together with drains, corners, floor-to-wall junctions, penetrations and door thresholds, need explicit detailing and inspection.
Technical discussion
Do you have a comment or question?
Describe the actual construction or detail. Submissions are moderated and are not published automatically.